깃허브: https://github.com/leejeongchan/springSecurity.git
스프링 웹 시큐리티 동작 방식은 필터와 인터셉터를 이용합니다.
인터셉터는 스프링에서 필터와 유사합니다.
두 공통점은 특정 서블릿이나 특정 컨트롤러의 접근에 관여하지만
차이점으로 필터는 스프링과 무관하고 인터셉터는 스프링의 빈으로 관리 된다는 점입니다.
우선 Spring Web Security를 설정합시다.
우선 pom.xml에 다음 라이브러리를 받습니다.
<!-- security -->
<dependency>
<groupId>org.springframework.security</groupId>
<artifactId>spring-security-web</artifactId>
<version>5.0.6.RELEASE</version>
</dependency>
<dependency>
<groupId>org.springframework.security</groupId>
<artifactId>spring-security-config</artifactId>
<version>5.0.6.RELEASE</version>
</dependency>
<dependency>
<groupId>org.springframework.security</groupId>
<artifactId>spring-security-core</artifactId>
<version>5.0.6.RELEASE</version>
</dependency>
<dependency>
<groupId>org.springframework.security</groupId>
<artifactId>spring-security-taglibs</artifactId>
<version>5.0.6.RELEASE</version>
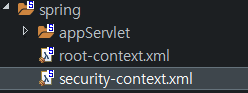
</dependency>그 다음 security-context.xml을 따로 생성해줍니다.
그다음 네임스페이스에서 security 항목을 선택합니다.

단 주의사항은 5.0 네임스페이스에서 문제가 발생하므로 수정이 필요합니다.
<?xml version="1.0" encoding="UTF-8"?>
<beans xmlns="http://www.springframework.org/schema/beans"
	xmlns:xsi="http://www.w3.org/2001/XMLSchema-instance"
	xmlns:security="http://www.springframework.org/schema/security"
	xsi:schemaLocation="http://www.springframework.org/schema/security http://www.springframework.org/schema/security/spring-security.xsd
		http://www.springframework.org/schema/beans http://www.springframework.org/schema/beans/spring-beans.xsd">


</beans>
ㅇ위 부분에서 5.0.xsd를 그냥 .xsd로 바꾸어 줍니다.
web.xml에서는
	<filter>
		<filter-name>springSecurityFilterChain</filter-name>
		<filter-class>org.springframework.web.filter.DelegatingFilterProxy</filter-class>
	</filter>

	<filter-mapping>
		<filter-name>springSecurityFilterChain</filter-name>
		<url-pattern>/*</url-pattern>
	</filter-mapping>
를 추가해주고
위에서 context-param에서 param-value에 security-context.xml 위치를 넣어줍니다.
	<context-param>
		<param-name>contextConfigLocation</param-name>
		<param-value>/WEB-INF/spring/root-context.xml /WEB-INF/spring/security-context.xml</param-value>

	</context-param>
그 다음 security-context.xml에는 아래와 같이 추가해줍니다.
<?xml version="1.0" encoding="UTF-8"?>
<beans xmlns="http://www.springframework.org/schema/beans"
	xmlns:xsi="http://www.w3.org/2001/XMLSchema-instance"
	xmlns:security="http://www.springframework.org/schema/security"
	xsi:schemaLocation="http://www.springframework.org/schema/security http://www.springframework.org/schema/security/spring-security.xsd
		http://www.springframework.org/schema/beans http://www.springframework.org/schema/beans/spring-beans.xsd">

	<security:http>
		<security:form-login/>
	</security:http>

	<security:authentication-manager>

	</security:authentication-manager>
</beans>
즉 security 시작 지점이 필요하고 인증 관리자가 필요로 합니다.
우선 Security가 필요한 URI를 설계해줍니다.
즉 보안에 필요한 URI를 설계합니다.
/sample/all -> login하지 않은 사용자도 접근 가능 URI
/sample/member -> login 한 사용자들만 접근 가능 URI
/sample/admin -> login 한 사용자들 중에서 관리자만 접근 가능 URI
우선 SampleController를 작성해줍시다.
package org.zerock.controller;

import org.springframework.stereotype.Controller;
import org.springframework.web.bind.annotation.GetMapping;
import org.springframework.web.bind.annotation.RequestMapping;

import lombok.extern.log4j.Log4j;

@Log4j
@RequestMapping("/sample/*")
@Controller
public class SampleController {

	@GetMapping("/all")
	public void doAll() {
		log.info("모든 사람들 접근 가능");
	}

	@GetMapping("/member")
	public void doMember() {
		log.info("로그인 한 사람만 가능");
	}

	@GetMapping("/admin")
	public void doAdmin() {
		log.info("admin only");
	}
}
ㅇ
위처럼 작성을 해줍니다.
뷰에는 해당 URI에 맞는 화면을 작성 해줍니다.
sample 폴더 생성 후 밑에 all.jsp member.jsp admin.jsp를 작성 해줍니다.
우선 인증과 권한부여에 대해서 자세히 알 필요가 있습니다.
인증은 자신을 증명합니다.
권한부여는 남에 의해서 자격이 부여되는 것입니다.
한 마디로 A라는 사람이 어떤 것을 수리하고자 B회사에 들어갔을 때 신분증 검사가 인증이고
B회사가 A에게 수리할 권한을 부여하는데 이를 권한부여라고 합니다.
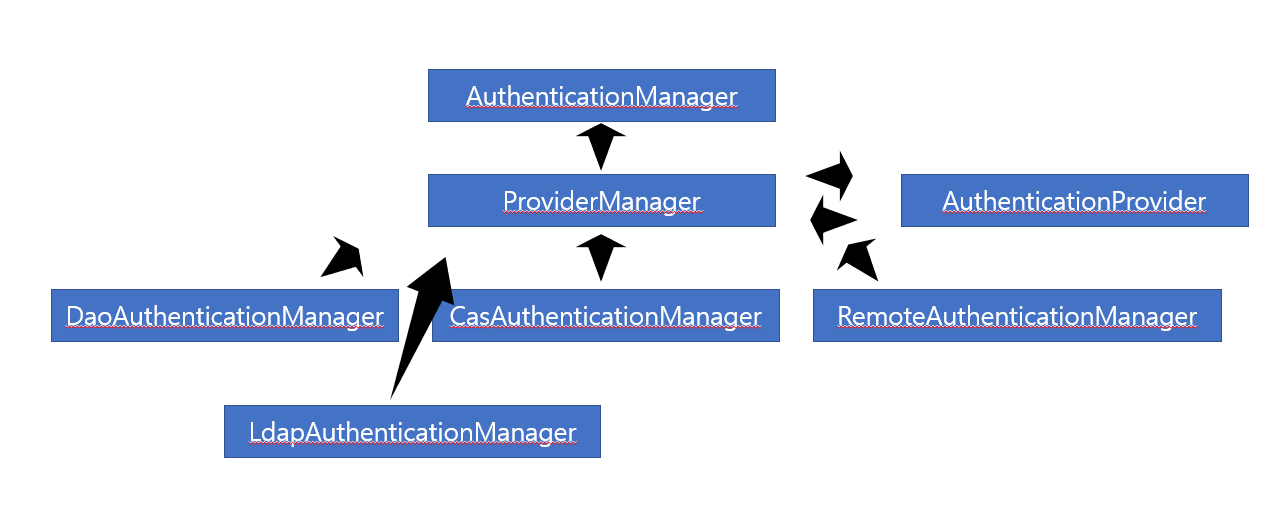
즉 AuthenticationMager가 인증을 담당하는데 다양한 인증을 처리하도록 도와줍니다.
ProviderMager는 인증에 대한 처리를 AuthenticationProvider 객체를 이용해서 처리를 위임합니다.
AuthenticationProvider 은 실제 인증을 처리합니다. 인증 정보에는 권한 정보도 같이 전달합니다.
UserDetailsService와 관려이 있습니다. 사용자 정보와 권한 정보를 함께 반환합니다.
크게 AuthenticationProvider를 구현하거나 UserDetailsService를 구현하는 방식이 있습니다.
UserDetailsService로도 충분하지만 프로토콜이나 인증 구현을 직접 구현할 때는 AuthenticationProvider를 구현합니다.
'웹 > Spring' 카테고리의 다른 글
| 웹 시큐리티(Web Security)-3Day (0) | 2019.05.27 |
|---|---|
| 웹 시큐리티(Web Security)-2Day (0) | 2019.05.26 |
| Spring 트랜잭션 설정 (0) | 2019.05.06 |
| Spring 트랜잭션 & 데이터베이스 설계 (0) | 2019.05.06 |
| AOP 적용 (0) | 2019.05.04 |